How to install Solus on a ChromeBox
What’s Solus?
Solus is a Linux operating system designed for desktop use. Unlike many Linux flavours, it’s not a fork from one of the major distributions. Instead, it’s been developed from the ground up for desktop use. The desktop interface, from the same team, is called Budgie. We’ve dabbled with Solus a few times and it’s been one of our favourite desktop distributions for quite some time.
Solus supports the standard ChromeBox hardware out of the box, making it an ideal option for those wanting to get more out of their device without losing out on the ease of use and sharp performance.
What’s a ChromeBox?
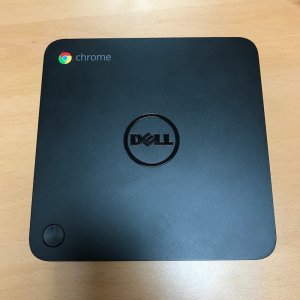
A ChromeBox is a small, relatively low powered desktop computer running ChromeOS. They were released by a number of vendors such as Asus, Acer and Dell. They offer excellent value and a secure and reliable environment – but the tradeoff is that you cannot install applications – everything works as a web app. These can be added via the Chrome store. It’s basically a computer that only runs the Google Chrome browser.
Preparing your ChromeBox
ChromeBox comes as standard with built-in protection against making changes to the firmware. In order to change the operating system, we need to remove this protection. The first thing you need to do is ensure you have any files you need off the ChromeBox or they will be lost in the process.
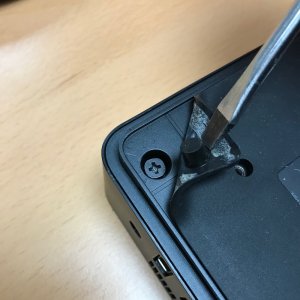
Now, disconnect the ChromeBox and peel up the rubber on the rear (or rubber feet on some models). This will reveal a screw in each corner.
Remove the screws.
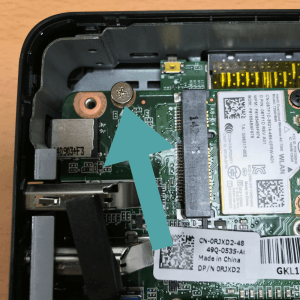
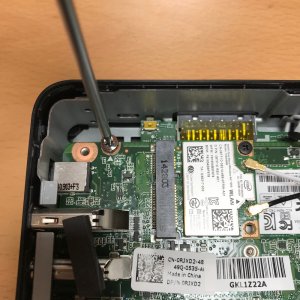
The rear should now lift off with a little jiggling. Once inside you need to identify the Firmware Write Protection screw.
This needs to be removed and put to one side for safekeeping.
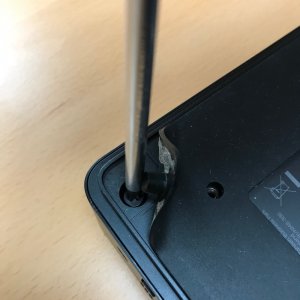
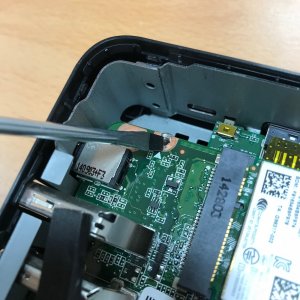
On our ChromeBox, we discovered that after removing the screw the protection stayed in place, as there was still a little metal under the screw completing the circuit. This has been reported in other Dell models too. So you may need to use a flat-head screwdriver just to give the area a scrape to remove this.
You can now put the rear case back on and secure it with the screws. Connect up to power, keyboard/mouse & monitor.
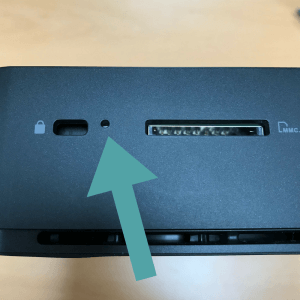
Before powering on your Chromebox – insert a paperclip (or iPhone SIM card remover too) into the small hole next to the SD card slot.
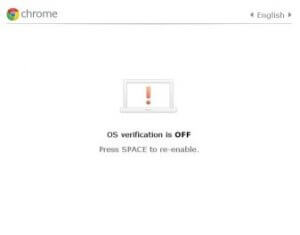
With the button pressed, power on the ChromeBox. It will now boot up to the Recovery Screen.
Press Ctrl + D to enter developer mode then press the recovery button again with the paperclip.
It will take 4-5 mins to wipe any existing content and will then boot into developer mode.
At this point, you should select your language and setup internet access then stop.
Flashing the Firmware
We’re going to use the script developed by Matt DeVillier to do this stage.
Press Ctrl + Alt + F2 (this is the Forward arrow on a ChromeOS keyboard) to enter the command prompt.
When prompted for a username enter: chronos
and press return.
The following will download and execute the E-Z Setup firmware script:
cd; curl -L -O https://mrchromebox.tech/setup-kodi.sh && sudo bash setup-kodi.sh
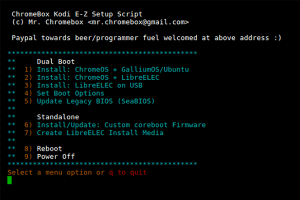
Select option 6 – Install/Update: Custom coreboot Firmware.
If you think you may wish to return to ChromeOS in the future, use the option to backup ChromeOS files to a USB, otherwise we are ready to proceed to install Solus.
Download and prepare Solus
Firstly download the ISO for your prefered version of Solus from here: https://solus-project.com/download/
If you’re unsure, we’d opt for Budgie – it’s very attractive and easy to use.
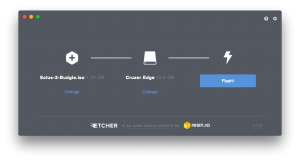
We now need to put the ISO file onto a bootable USB stick. This can be quite complex, so we recommend the brilliant tool made by resin.io – Etcher. Versions are available for Windows, macOS and Linux.
You can download it, for free, here: https://etcher.io
Simply select the ISO file, plug in your USB drive and click ‘Flash!’
Install Solus
Insert the newly flashed USB drive into a spare socket on your ChromeBox and reboot.
As the ChromeBox turns back on, press the ESC key to enter the boot menu – you have only around 5 seconds to do this.
You’ll see the option to boot Solus 3, which you should select.
Solus will now boot from your USB stick. Once booted you’ll see an orange box with an arrow pointing downwards in the top left of the screen. Double click this to begin the installation.
You should select the option to remove all existing partitions to allow you to make maximum use of the relatively small drive in your ChromeBox.
Once the installation has finished, remove the USB drive and do a final reboot. You’ll now be prompted to install any updates (since Solus is a rolling release) to bring your system up to date.
Using Solus
Solus is extremely attractive and runs very quickly on the ChromeBox hardware – boot takes only around 10 seconds and the choice of software is extensive. Alan has actually been using the ChromeBox running Solus as his primary device since I installed it!
If you need any help with Solus, there is a very busy community and they have a Twitter and Facebook if you want to keep up to date. If you follow this tutorial, please let us know how you get on in the comments below.
References
Thanks to the following sites which were used as resources to put this guide together:
http://dareneiri.github.io/Asus-Chromebox-With-Full-Linux-Install/
http://kodi.wiki/view/Chromebox
https://mrchromebox.tech/
Recent Posts
Recent Comments
- anonymous1024 on Pi-hole vs AdGuard Home
- Konrad on Add https to Pi-hole with caddy
- jolu on Add LetsEncrypt SSL certificate to Pi-hole
- Mike on Add https to Pi-hole with caddy
- Kamyar on Pi-hole vs AdGuard Home

