Before we start – you will need root access to your WHM/cPanel server to be able to follow this guide.
What is Fathom?
Fathom is a privacy centred analytics system written by Danny and Paul. By not collecting any identifiable data, or tracking users between different websites, Fathom is designed to be ‘easy to use and treats citizens of the web with respect and privacy’.
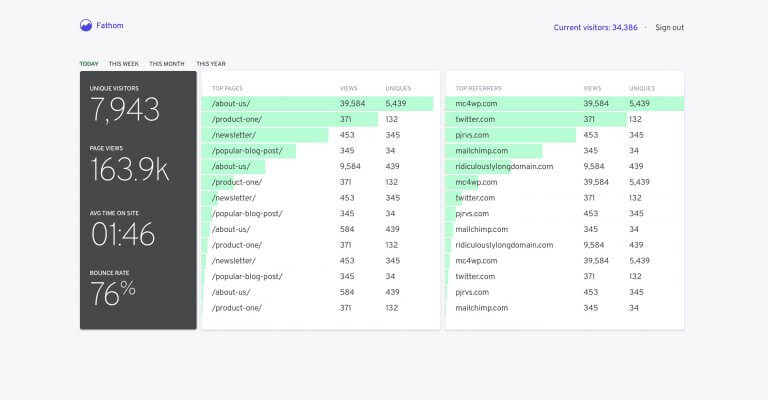
This is our kind of analytics, and is what we use ourselves. You can view a demo here. It’s very pretty.
The writers offer a hosted version of their software for anyone that doesn’t want to manage it themselves and it’s priced very reasonably. However, they have also released the software as Open Source under the MIT license.
Install Guide
We’re going to assume you’re using cPanel 74+ on CentOS 7, running Apache 2.4. You’ll also need to ensure you have the mod_proxy module installed through EasyApache 4.
Firstly, create an account, through WHM, which you’re going to use for Fathom. The choice of domain/subdomain is entirely yours, but for the sake of ease we’ll assume that you’ve given it the username: fathom and the home directory is: /home/fathom
Login to your server via SSH.
Download the latest version of Fathom:
[user@server] wget https://github.com/usefathom/fathom/releases/download/latest-development/fathom-linux-amd64
And then move it to the local bin directory, and make it executable:
[user@server] sudo mv fathom-linux-amd64 /usr/local/bin/fathom
[user@server] sudo chmod +x /usr/local/bin/fathom
Now, we need to setup systemd to start and stop the application:
[user@server] sudo nano /usr/lib/systemd/system/fathom-server.service
Copy & Paste the following into your file:
[Unit]
Description=Starts the fathom server
Requires=network.target
After=network.target

[Service]
Type=simple
User=fathom
Restart=always
RestartSec=3
WorkingDirectory=/home/fathom
ExecStart=/usr/local/bin/fathom server

[Install]
WantedBy=multi-user.target
Then ctrl+o to save and ctrl+x to exit.
Now we need to create a configuration file for fathom.
[user@server] sudo nano /home/fathom/.env
Enter the following, but replace the ‘random-secret’ with your own random text.
FATHOM_SERVER_ADDR=9000
FATHOM_DEBUG=true
FATHOM_DATABASE_DRIVER="sqlite3"
FATHOM_DATABASE_NAME="fathom.db"
FATHOM_SECRET="random-secret"
Then change the file to be owned by the fathom user:
[user@server] sudo chown fathom.fathom .env
Now, we can start up the fathom server to create the database. Simply run:
[user@server] sudosystemctl daemon-reload[user@server] sudosystemctl start fathom-server
If you visit your server hostname on port 9000, you’ll be able to see Fathom running (http only at this point).
Add your first user with the following command:
[user@server] sudo fathom user add --email="john@email.com" --password="strong-password"
You’ll now be able to login via port 9000.
To ensure fathom restarts on reboot, simply run:
[user@server] sudo systemctl enable fathom-server
Setup Apache Proxy
We don’t want to be collecting stats via an obscure port, or via http – so we’re going to setup a proxy in Apache.
The cPanel documentation for editing http.conf hosts is available here. All we need is a simple proxy config adding for https/ssl/tls connections.
If, for example, your fathom account was setup at: analytics.mydomain.com we just need to create the following file:
/etc/apache2/conf.d/userdata/ssl/2_4/fathom/analytics.mydomain.com/proxy.conf
You may need to create the ssl/2_4/fathom/analytics.mydomain.com directories yourself using ‘mkdir’.
In the file (using nano or your preferred text editor) enter the following:
ProxyPreserveHost On
ProxyPass / http://127.0.0.1:9000/
ProxyPassReverse / http://127.0.0.1:9000/
If you also intend to proxy the http connections, just replace ‘ssl’ with ‘std’ in the above structure, but add the following after the first line to allow auto_ssl to work:
ProxyPass /.well-known/ !
Now, rebuild the Apache config:
/usr/local/cpanel/scripts/rebuildhttpdconf
and restart Apache:
/usr/local/cpanel/scripts/restartsrv_httpd
You should now be able to view your Fathom install securely over https, and without having to open any additional ports in your firewall.
Just add the tracking snippet to any sites you wish to use the analytics on – they’ve even made a WordPress plugin.


Recent Comments